Have you been enjoying Eloqua's Contact Filter options but want some ideas for incorporating them into your email marketing, beyond simple segmentation?
A great way to incorporate the filter options into your email campaigns is to use the concept of Email Frequency or as one of my client’s has coined it: “The Stop Light Program.” This allows you to address issues with over-saturating prospects/contacts with emails by automatically having them removed from email sends once they reach an appropriate number of email receptions.
The need to create a program is no longer required but the idea is still much the same: Create a series of Filters based on email frequency ranges that assign contacts a Red, Yellow or Green value. Based on the color assigned to the contact you can then implement these filters into various areas of the application to either block or allow email sends to these contacts.
Prerequisites for Filters
What you want to do is to decide beforehand what amount of email sends should classify a contact to be placed into the Red, Yellow or Green categories. You will need to input those values in your filters when you create them.There are valuable reports in Eloqua that will help you decide as an organization what are acceptable email ranges to assign to your different colors.
An example would be as follows:
- Red – received over 10 emails in last month
- Yellow – received between 4 and 9 emails in last month
- Green – received between 1 and 3 emails in last month
A valuable report is the Email Frequency by Contact Group (which is also a great report to look at on your Contact Group Dashboards) which will show you all the contacts in that group and how many emails they received within a certain time range:

Creating Filters
To create a new filter click Communicate > Email Marketing > Contact tab and select the Contacts dropdown. Select "Create a New Contact Filter."
Once you are in the Contact Filter canvas you can see all your criteria options on the right hand side which can be dragged and configured on your canvas area.
The criteria we are interested in is the “Have Been Sent an E-Mail”: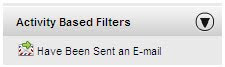
Click and drag that criteria onto the canvas and a configuration window will pop up:
Each color will be its own filter and the email amounts can be altered at any point as your initial ranges may be re-thought.
Additional criteria such as Contact Data may be used to further segment out your contacts to target specific industries, companies or countries, i.e. adding a criteria to only see contacts that are part of a certain company:
Another good tactic is to incorporate other activity based criteria into the filter such as Opened Emails, Clicked and E-mail, etc. This allows for granular filtering and also then allows for more flexibility in how you leverage these new filters.
Leveraging the Filters
Now that you have these filters built you want to know how to implement them into your current process to possibly prevent “Red Stop Light” contacts from receiving any emails until they are Yellow or placing your “Green Stop Light” contacts into a nurturing campaign. Below are some suggestions that might help you decide how you are going to incorporate these filters into your system:
- Master Exclude List - If you are experiencing issues where you don’t want any contacts who have received over a certain amount of emails to be emailed at all until they are within Yellow or Green ranges then placing the “Red Stop Light” filter into the master exclude area would be an option. The master exclude list can be accessed by Customer Administrators under the Setup->Management ->System Management tab but be warned that any contacts added to this list are EXCLUDED from any email sends in your system.
- Default Distribution Lists– Another exclusion option is to add the “Red” filter into default distribution list’s excluded area which would mean any NEW distribution lists will automatically have that filter as an excluded asset. The Default distribution list configuration is again only accessible by Customer Administrators and can be found in the Setup->Management->User management tab and from there just click the User Defaults and Settings menu:
- Nurturing Campaigns– What to do with the Red and Yellow filters is generally obvious but there are possibilities for your Green filter where you can combine activity criteria (opens, clicks,etc) as mentioned earlier in the post to pull contacts into a lead nurturing program. This allows you to engage a target audience who you know is interested in your product/service but has not been bombarded with recent emails.
Hopefully this had shed some light on the power and flexibility of our new Contact Filters and encourages you to try and think outside the proverbial box.